Playing with FHIR – TUT001 : Getting ready for FHIR and REST
To get started we need to ensure that we have the correct software in place. We will be using the Chrome web browser and a chrome application called “Postman”.
First of all ensure you have Google Chrome installed. Open up chrome and navigate to the Chrome Web Store and search for “Postman”
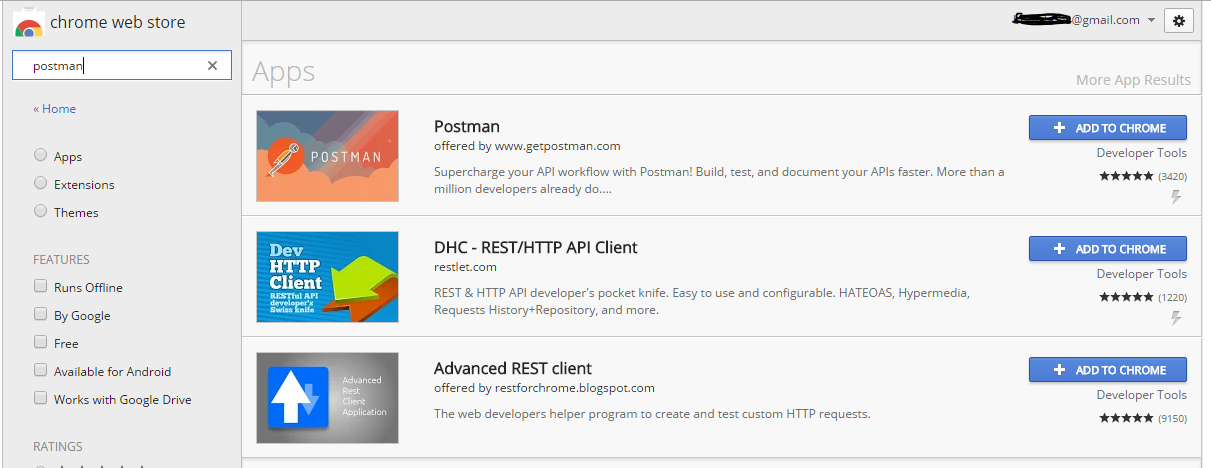
Click the “Add to Chrome” button for the “Postman” app and wait for the application to install, once installed the button should turn green

The application is installed and ready to go now. To launch the application click the “Apps” button shown in the top left of the image above. This will show you all of the Google Chrome apps you have installed. Looking a little like this (I have greyed out the apps that are not of interest). Click the postman logo and the application will launch.

The Postman application allows you to make HTTP calls directly from your browser. There are other tools that allow this and they should work equally as well. I’ll be using Postman for all of the tutorials just for consistency.
So you should now have a screen looking a bit like this:
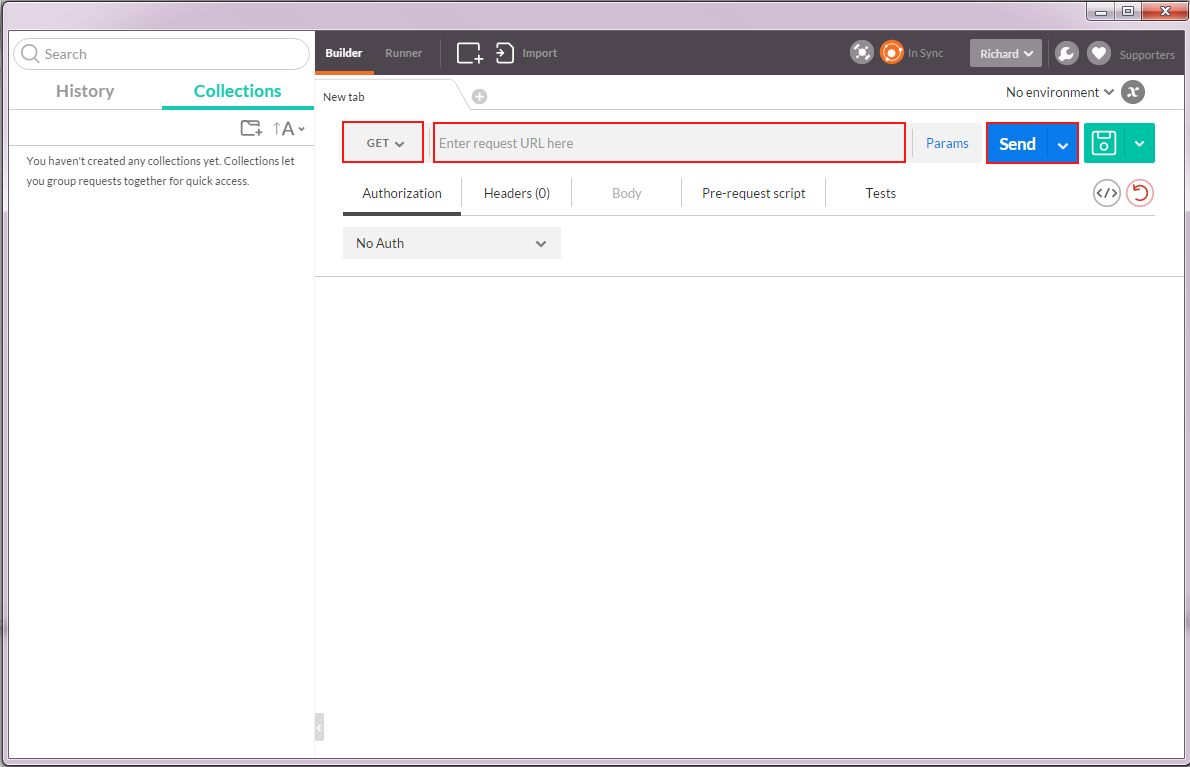
Just to test things are working then perform the following (looking at the highlighted red rectangles on the image above)
- Ensure the HTTP verb is set to “GET”. This is the default so it should already be set.
- Enter the following in to the next box : http://spark-dstu2.furore.com/fhir/Patient/spark28
- Click the “Send” button
What you should now see is something along the lines of the following

Take note of where I have marked the red rectangles.
- The default “Body” tab shows the payload returned from the FHIR server
- The “Headers” tab shows the “HTTP Headers” returned (we’ll use these in later tutorials)
- The “200 OK” status is the HTTP Response colde. In this case it means the call has been successful. Not all calls result in a 200 OK and once again we’ll tackle these in later tutorials.
So assuming you’ve got this far we have achieved :
- Configuring “Google Chrome” with the “Postman” application
- Executed our first “RESTful” call to a FHIR server.
In the next tutorial we’ll delve more into the different HTTP verbs that FHIR uses and store our first resource on a server.
If you have any questions or feedback on this tutorial then please feedback so we can improve the future tutorials.
Was this article useful?
19